August 31, 2014

Bacon Pecan Waffles Recipe

Pin It
This August has been a strange one.  We have been experiencing a thunderstormy end to an adventure filled summer.  The storms have been beautiful..but frightening for my 3 year old.  For the last few weeks every time she hears a noise that is thunderish she covers her ears and cowers.  Try as I might, I cannot get her to stop being frightened.  I tried to explain thunder, I told her what the different not scary sounds were (airplane, garage door opening, etc.), we tried playing games, and more.  But that kid is just scared!

On a less scary note I'm blogging again! Yep, I decided that I had better get back to it because I have been cooking up some delicious delights.  To start things off I am taking a super easy approach to a gourmet breakfast.  Not too long ago I stayed with my sister-in-law and she made some crazy tasty waffles for us.  She added in a little bacon and some chopped walnuts to the batter and they were glorious.  I was wishing that I could have been a pig and eaten all of them.  So I decided I had better make them when I was in the privacy of my own home where I could have seconds...or thirds..


You will need Milk, Bisquick, an Egg, Walnuts, and chopped Bacon.

Mix the Bisquick according to the waffles instructions and finely chop the Walnuts.

Pre-heat you waffle iron and spray it with a little non-stick spray.  Place the waffle mix on the iron and quickly sprinkle with a bit of the bacon and a bit of the Walnuts over the top.  Close and cook as you normally would.

When done add a dollop of butter, drizzle with maple syrup, and enjoy!
The maple syrup adds a gooey richness to the waffles that can't be beat.  These waffles have a fun savory nutty flavor that really gets you going in the morning.  Very filling and perfect for a busy day.  They are also perfect when you want breakfast for dinner.  Give them a try, you won't be disappointed! Pin It

February 12, 2014

Easy Biscuits and Sausage Gravy Recipe

Pin It
Comfort food alert!

Be warned that I am about to give you one of my very favorite recipes.  Not only does this whip up quickly and easily...but it is so delicious that it will blow your socks off!


Nothing says comfort food to me more than biscuits and sausage gravy.  My Grandmother and my Mother made this dish a favorite by cooking it all through my childhood.  I can still count on an amazing breakfast of biscuits and gravy when I visit my Grandmother.


Did I mention that this is super easy to make and a favorite weeknight meal for me?  Give it a try and you'll be in sausage gravy heaven!


I think this meal requires Pillsbury Grands refrigerated biscuit dough and Jimmy Dean Sage flavored sausage.  They are basically best friends when hugged with gravy.  No need to slave over making fancy homemade biscuits..but if you do I'm sure they would be delicious, too!


Enjoy!


Biscuits and Sausage Gravy Recipe

1 can refrigerated Pillsbury Grand Biscuits
1 Package Jimmy Dean Sage Sausage
1/2 C Flour
3 C Milk
Salt and Pepper to taste

Cook the Biscuits as directed on the package.  I usually start pre-heating the oven when I begin browning the sausage and put them in the oven when I start the gravy.  This will give you hot gravy and hot biscuits every time.

In a large skillet brown and crumble the sausage.  Once the sausage is browned add in the flour and seasoning, stirring it well and cook for a couple of minutes.  My Grandmother likes to add a little Lemon Pepper but my Mother is a purist with just Salt & Pepper.  Add the milk and stir until combined.  Bring the mixture to a boil then simmer until it reaches your desired Gravy thickness.

Split the cooked biscuits in half and top with plenty of the decadent Gravy and Enjoy!


Pin It

January 11, 2014

Two Ingredient Crockpot Beef Recipe

Pin It
When I first saw this recipe floating around online I was very skeptical.  I couldn't believe that something so simple could end up tasting good.  Two ingredients!!  No way, that can't be!

Being the daring individual that I am, I decided to give the impossible a try!  And, wouldn't you know it...this really is simple and delicious!  I am a true believer that you can make something awesome with just a crockpot and two ingredients.  I found the recipe here where they were calling it the "Best Crock Pot Recipe.. Ever."


All you need is a Roast and a bottle of sliced Peppers.  Just put the roast and the whole can of peppers including the juice in a crock pot.  Set to Low and cook for 8 hours.  Easy as pie!  I didn't even Salt & Pepper the meat, which made me nervous.  But, the peppers and their juices just made that meat turn its tasty on!  When the meat is done you can just use two forks to shred the meat.


I decided to use my meat in a sandwich.  I just got a roll, which I sliced in half and toasted with a little butter on a skillet, I then added a little mustard and mayo to one side and a Laughing Cow wedge to the other.  The Laughing Cow was so creamy and delicious on this sandwich!  Then I added plenty of meat and peppers.


Super yummy!  Did I mention that it was wicked easy, too?


2 Ingredient Crockpot Beef Recipe
Source:  Three Peas in My Little pod

Beef Roast (mine was about 3 lbs)
Bottle of Sliced Peppers

Add Beef and Peppers, along with the juice, to the slow cooker and cook on Low for 8 hours.  When done the tender meat can be shredded with two forks.

Enjoy! Pin It

December 3, 2013

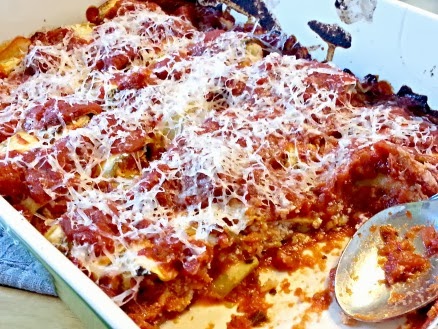
Eggplant with Lemon Zest Ricotta Recipe

Pin It
The holidays are here!  I can't believe Thanksgiving has passed and Christmas is knocking at my door.  It snowed, a lot, today.  My older kids were so excited to put on their snow suits and play in the white fluffy stuff.  My oldest loves to build castles, forts, and other structures.  The trouble is, that she usually insists on building them in my driveway...not the most convenient spot if you ask me.

My oldest building driveway obstructions.


My middle child eating snow and playing with our snow beast.
My family doing a turkey trot Thanksgiving morning.

Now back to the subject at hand...food!  Not just food, but really super good food.  I found this tasty delight here and boy am I glad I did!  I have whipped up this dish twice and I love the flavor combo.  To try and save a few calories I decided to roast the Eggplant rather than fry it.  My kids weren't thrilled with the Eggplant skin so the second time I made the dish I cut off the skin.  Give it a try when you have an eggplant or two just hanging around.

You will need Panko Bread Crumbs, Parmesan Cheese, Lemon, Marinara, Thyme, Eggplant, Ricotta Cheese, and a Mandolin slicer.  You could probably get by without the Mandolin...but it sure makes things easy.

This recipe takes a little prep to try and extract the liquid in the Eggplant but it is so worth it!

The filling is so lemony and delightful.  I could probably just eat it with a spoon.

I used jarred Marinara but you could make your own to up the awesome.

Enjoy!!


Eggplant with lemon Zest Ricotta Recipe
Source:  Alexandra's Kitchen

1 Eggplant
Salt
Marinara Sauce
1/2 C Panko Bread Crumbs
1 C Ricotta Cheese
1 Lemon, all the Zest and 1/2 the Juice
1 tsp Thyme
Grated Parmesan Cheese
Salt & Pepper to taste

Pre-heat oven to 350 degrees.

Slice the Eggplant thinly lengthwise with a Mandolin slicer.  Sprinkle both sides with a bit of salt and let sit in a colander over a sink for about 30 minutes.  This will draw out excess moisture and help them to roast up nicely.  Use a paper towel to get off moisture and excess salt.  Place on a baking sheet and sprinkle with a little olive oil.  I used my Misto and gave them a light spraying.  Roast for about 20 minutes, or until they are tender.  Check at 15 minutes because they go from good to crispy pretty quickly.  Allow them to cool.

Pre-heat oven to 450 degrees

In a Bowl mix together the Lemon Zest, Lemon Juice, Ricotta Cheese, Panko Bread Crumbs, Thyme, and a bit of Salt & Pepper.  Lightly cover the bottom of a baking dish with Marinara Sauce.  Place a Heaping spoonful of the Ricotta mixture on one end of the Eggplant and roll it up.  Place seam side down in the baking dish.  Top with More Marinara and a good sprinkling of Parmesan Cheese.  Bake for 20-25 minutes.

Enjoy!


Pin It

October 28, 2013

Jello Worms Recipe great for Halloween!

Pin It
Do you have a Halloween Party coming up?  Do you want to have the spookiest, creapiest, crawliest dessert of all?  Then have I got a treat for you!  I made this the other day for my work's Halloween party and I won $$ for having the spookiest dessert of all.  These Jello worms are so awesome and  worm-like that it is just a bit on the foul side.  They wiggle and squirm just like a worm would.

You will need 100 bendy straws with the bendy parts extended
You need a package of red Jello..most of the recipes call for Raspberry, but I was a rebel and got Dark Cherry.
You also need 3 packets of unflavored Gellatin to amp up the firmness..nobody wants a soggy worm.
You need about 1/3 Cup of Heavy Cream
Then add in about 14 drops of food coloring.  I used a gel coloring and sadly added too much and my worms went green and weren't too wormy.  Then I decided to do some orange ones for contrast.


Put the Jello and extra Gellatin in a large bowl and mix in 3 Cups of Boiling water.  Whisk together well until everything is melted and combined.  Then let the mixture cool for a bit.  I stuck mine in the fridge for about 15 minutes or so.

Then add in the Cream.  You can either mix well to get a good and cloudy colored worm..or mix gently for a more marbled look. 


Stick the straws with the bendy part on the bottom and place a rubber band around the top and bottom.  Then place them in a tall but narrow container.  I used a drinking glass.  Pour in a little bit of the jello...not too much.  Place the glasses in the fridge for about 20 minutes to get a good solid base started.


After the 20 pour in the rest of the Jello and let sit overnight.

The next morning you will have a gelatinous mound of goo in your glass.  Use a butter knife or something to help get it out.  Peel off the excess Jello and run the straws under slightly warm water to clean them off.


There are several ways to get them out of the straws..but the best way is to use a rolling pin.  Just pop 3 of the straws on the counter..steamroll over them with the rolling pin and watch the creepy worms just squiggle on out.

Believe me when I say that trying to get them out by hand SUCKS!  They are slippery..messy..gooey..and just plain hard to hold onto.  You can always go the pliers route..but the rolling pin is by far the best!


Make sure you wiggle them like a good worm as you eat them.  It makes it feel a bit more real...

 Enjoy as you take in the glory of your wormy dessert.  Praises and prizes galore!


Source:  Mel's Kitchen Cafe

Pin It

October 24, 2013

Easy and Spooky Spider Cookies

Pin It
I love holiday baking!  And, if you ask me holiday baking starts in October.  Yep, Halloween is a very bakeable holiday in my opinion.  There are so many fun and ghoulish things that you can bake up.  The other day I was cruising my blogging buddies page and saw these creepy crawly spider cookies.

I decided to give it a whirl with my older kids and we had a blast making (and eating) these scary spiders.  I found that my chocolate chips weren't melty enough to draw on the legs so I just melted a few left over chips and used that to create the spooky legs.


Halloweeny and perfect!  Whip them up and creep out all your friends. Pin It

October 8, 2013

Oven Peanut Butter S'mores Recipe

Pin It
I love nothing better than a fun night out in the canyon with good friends.  Hot dogs cooked over an open fire pit, kids running around getting filthy, having to bum salt from the guys next to you cause ya'll forgot yours, and the s'mores!  Oh yes, the s'mores!  They weren't kidding when they named those beauties s'mores..cause you always want s'more!

Alas, you don't always find yourself in the canyon when the craving for a tasty, toasty, melty s'more arises.  So what do you do?!  Check this baby out and you'll never be hungry again!  Or at least you can curb a craving quickly and easily.


You will need Graham Crackers, Peanut Butter, Marshmallows, and Chocolate Chips (I used semi sweet)

Get your awesome and absolutely adorable helper to pitch in on this recipe.  Just have her slather those Grahams with Peanut Butter.  Excellent..that looks great!

Hey now!  what do you think you are doing?  Get back to work.

Next have your helper place a few Marshmallows on each graham.  Nicely done!

What?!  Wait!  This is a serious food blog..there is no room for tomfoolery!

Excellent, let's focus on the food!  Place a few chocolate chips here and there amongst the Mallows.

Place them on a parchment lined cookie sheet and put in the oven under a warm broiler...but be careful!  These cook up very quickly...usually in a minute or so.  Just keep your eyes peeled because one second they aren't done and the next they are darker than you want!


Enjoy..Just like my kids did!


Oven Peanut Butter S'mores Recipe

Graham Crackers
Peanut Butter
Marshmallows
Chocolate Chips

Pre-heat the oven's broiler.  Spread PB on the Grahams then top with Marshmallows and chocolate chips.  Place in oven on a parchment lined baking sheet... but watch very closely because these go from not done to over done very quickly.  Takes about a minute or so to toast the Mallows.

Enjoy! Pin It

September 27, 2013

One pot Spaghetti with Tomatoes and Basil Recipe

Pin It
Fall has come around in a real hurry.  Last week my kids and I were out in our short shorts enjoying water activities.  This week we have been huddled up under our coziest blankets watching the rain ruin all our summer fun.  In fact, I heard that it snowed not too far from where I live.  I love the fall...but I'm just not ready for snow yet.  Looks like we are in for a cold winter this year. 


Warm, cozy, and having a blast!

As an ode to summer ending I am going to post a fun, easy, and surprisingly yummy recipe I tried.  I came across the recipe here, but I believe it was dreamed up by Martha Stewart and all of her infinite wisdom.  This pasta recipe cooks up super quick and somehow everything all works together despite it being against all food rules.  You literally toss everything into a pot and cook away.  I ate my leftovers with a bit of bacon mixed in and boy did that pump up the yummy.

You will need Fresh Tomatoes (these beauties came fresh from my garden), Fresh Basil (I snatched it from my sister's garden..I have no shame), Onion, Garlic, Spaghetti, Olive Oil, Red Pepper Flakes, Salt & Pepper, and water.  I also snuck in a couple of dashes of Italian Seasoning for good luck.

Chop up your veggies..make sure to leave a little Basil as a garnish.

How did this get in here?  She is almost 9 months old!!!  What!?

Toss everything into the pan!  Did I mention that you don't cook the noodles on the side before this step?  Oh no, you just toss 'em in with everything else?!  What is this madness!  Cook until the noodles are tender and most of the water is gone.  It kind of turns into a sauce.

Garnish with a little Parmesan Cheese and fresh Basil.

My older kids thought I was a cooking master and gobbled it all up!

One Pot Spaghetti with Tomatoes and Basil Recipe
Source:  Apron Strings

1 package of Spaghetti (I used Whole Wheat)
A bunch of garden fresh Tomatoes or a 15 oz can of diced tomatoes
4 cloves garlic
1 Onion
1/2 tsp Pepper Flakes
Handful of fresh Basil
1 tsp Italian Seasoning
Salt & Pepper to taste
4 1/2 C Water
2 TBSP Olive Oil
Parmesan Cheese and Fresh Basil to garnish

Chop up the Tomatoes, slice the Onion and Garlic thinly.  Place everything in the pot and bring to a steady boil.  Lower the heat to medium low and simmer for approximately 10 minutes, stirring often, until most of the liquid is gone and the noodles are tender.  Top with Parmesan Cheese and fresh Basil.

Enjoy! Pin It

August 7, 2013

Tutorial: How to cut a Mango

Pin It
Mangoes are basically the most delicious fruit of all time.  I'm fairly certain this is a known fact all around the world.  I'm pretty sure that having a mango tree would be better than a cash money tree in my backyard.  Pretty sure...

I ate mangoes for years before I learned how to cut them properly.  I'm a little surprised that I didn't cut my hand off in the pursuit of mango tastiness.  Once you get that peel off those suckers are awfully slick.  So in order to not have any finger casualties I am going to teach you how to dice a mango.

Wash your Mango..nothing is worse than a dirty fruit.

In the middle of the Mango is a huge non removable pit, and that sucker is bit.  It is kind of oval shaped and fairly flat.  You Just slice, as close to the pit as you can, the two sides off.

Slice the Mango into the shape that you want.  I wanted diced so I made a cute checker pattern with my knife.  Be careful not to cut through the peel.

Now just flip the mango peel out so the dices are poking out like this. 

Just slice those pretty little Mango chunks off..easy as pie!

I mentioned that the pit is oval shaped...that means there is still some yummy mango on the other sides of the pit.  Just slice them off getting as close to the pit as you can and cut the peel away. 

Check out all the yummy diced Mango!  So easy!

Hopefully you will be enjoying Mangoes in no time! Pin It

Mexican haystack Recipe

Pin It
This summer has been so fun and busy at my house.  I must admit that I have been a very lazy cook..something about the warm weather and running around.  There has been more than one night spent enjoying take out.

I decided that I had to put a stop to my food tomfoolery and I started to cook again.  I whipped up a yummy dish that my family loved.  Mexican Haystacks!!  Similar to Hawaiian Haystacks only about a million times more delicious.  I thought the Mango would be a little odd..but it was amazing!  Just the flavor pop that this dish needed.  Give it a try!  For reals..you won't be sad..you'll be satisfied. 


You will need Ground Turkey, Onion, Bell Pepper, Taco Seasoning, Cilantro, Mango, Salsa, Rice, Avocado, and Black Beans.
Start cooking the Rice according to package instructions.  Chop up the Onion and Bell Pepper and toss them in a warm pan with just a bit of oil.  Saute until softened.


Add the Turkey to the Bell Pepper/Onion mixture, toss in a little Taco Seasoning,  and cook until the meat is no longer pink.  Pour in some Salsa and let simmer a few minutes.  This is my top secret ingredient in all Taco meat. 

Dice the Mango (check here for instructions) and chop up the Cilantro.


Mix the Cilantro into the cooked rice.  Cilantro makes most things better.
Arrange the Meat, Rice, and toppings nicely so folks can put what they want on their Haystack.  See how tasty mine is!  Wowzers!  Enjoy!


Mexican Haystacks Recipe
Source:  Whole & Free

2 C Uncooked Brown Rice
1 Bunch Cilantro
1 tsp Olive Oil
1 Lb Ground Turkey
1 Onion, Diced
1 Bell Pepper, Diced
2-4 TBSP Taco Seasoning
1 C Salsa

Toppings:
1 Mango, Diced
1 Avocado, Diced
Black Beans

Cook the Brown Rice according to package instructions.

Meanwhile add the Onion and Bell Pepper to a pan with a drizzle of Olive Oil.  Cook for a few minutes until they begin to soften.  Add in the Ground Turkey and Taco Seasoning.  Cook until no longer pink.  Add in the Salsa and simmer about 20 minutes.

Chop up the Cilantro, Mango, and Avocado.  When the rice is done mix in a handful of the Cilantro.

Arrange all of the toppings so everyone can garnish as they please.  Start with rice on the bottom followed by the meat.  From there the possibilities are endless!

Enjoy!

Pin It